Tuesday, November 13, 2012

Google DevFest recap

I am back from Bolivia and Google DevFest season. We organized 2 DevFests, one in Cochabamba and one in La Paz. My first presentation was in Cochabamba and I was really nervous. I have terrible issues when I have to talk in front of people and this time wasn't the exception. Almost 250 attendees were that day and that was pretty scary for me. Anyways, at the end it was really good. I wish I had more time to do more code examples but it was good. Most of the people were Computer Science Students or Software Developers so my talk was a really good fit. I was really surprised when I found out that no body knew about my topic, I was happy I had the chance to introduce something new to them though.

GDG Cochabamba!!
In La Paz was completely different. There weren't as many developers as I thought there would be. Since the time was limited I barely did code examples and the audience itself wasn't for that kind of talk. At least I was more calm and relax than the first time and even kind of enjoy it :) The really sad part is that we had a special guest for this event. For the first time ever we had a Googler :) Nicolas Bortolotti , but due to bad organization he had to leave before we expected and because of that his presentation was a little bit short in time either way it was really nice to see him again and exchange some words.
a geek ;)
In summary it was a great experience and I got to meet really nice and good people. I really wish I could do this again since it was really fun and it helped me with my stage fright problem. What's more, I do enjoy sharing what I know with others.

You can see my slides here and I would really appreciate the feedback since this was my first doing it I would like the get better :)
Here is a video of my talk. Sorry, it is in Spanish :(


Thanks to everyone who made this possible :)


Thursday, October 11, 2012

GDG DevFest Season

Google Developer Groups DevFest are community-run events that offer speaker sessions about different Google technologies and they are all over the world. They started last month and they will last until November 11th so there is still plenty of time.


This year I have been really busy as GDG organizer for 2 cities GDG Cochabamba and GDG La Paz which are back in my beloved Bolivia :) and with the help of amazing people we are hosting the very first GDG DevFest in Bolivia this October 20th in Cochabamba a really beautiful city :) and I get to be a speaker this time. I will be talking about Google Apps Script for education. I am pretty much done with my slides but still I have never been so good at talking ( I like computer interaction more than people interaction ;) ) so let's hope I do not get stage fright or something.


The DevFest in La Paz is this October 24th and I wanted to talk about Git/GitHub for Android Development but I am not sure I will finish on time, work has been really really hard these last weeks. Anyways, I still want to talk about that and I will do it at some point but it seems not for this event. If everything goes as planned, we will have one Googler for this event and I am really excited about that since I am pretty sure this is going to be the very first time a Googler visit us so it is going to be amazing!

All the information about these GDG events are in the official page and the details about GDG Cochabamba DevFest and GDG La Paz DevFest as well. You can find one near by where you are and participate and have fun!

Happy DevFest Season :)

Friday, October 5, 2012

BlackBerry Jam Americas 2012 recap

I was invited to this year's BlackBerry developers conference in San Jose California. I think they invited to everyone who published an application in their App World. Anyways, I couldn't say no :) and I always like going to the west coast ;)

It was a 3 day event. So there was plenty of sessions and labs. I couldn't see the whole keynote due to a navigation error in other other words I took the wrong train :$
San Jose Convention Center
After the keynote all the sessions started. I tried to attend all the labs and the getting started sessions since I am really really new on this platform. I know I ported my Android App to the BlackBerry PlayBook but I think that is some kind of cheating since It uses the Android run-time. So basically it is Android running inside BlackBerry. I wanted to learn the native options to develop for this platform specially for forthcoming BlackBerry 10.
Using a PlayBook for registration, pretty cool ;)

I expected more attendees but I guess I am used to Google IO conferences, but that was fine so you did not have to fight for a place and the sessions and labs felt better since we were few we got better help and support.

The first 2 days were just sessions and labs. The third day was something they called the Unconference day on which the attendees decided the topics. It was a good idea but it did not have the attention required. At the end everyone was talking to everyone about their questions and curiosities. You just needed to look for a table with a good topic and that is all, you just joined them.
I really want one of these!!!

I must say that it was a good conference but I have the feeling that some of the sessions required more work and effort in the presentation. I expected more examples and code. Some were really really good but others felt like they were improvised.

I am sure RIM is trying to do its best to keep the community and developers working on BlackBerry 10 environment but I still think it is a little bit late. They are putting all their efforts on this new device and framework also they have started developer relationships all the world to keep growing its community, they are updating their blog with more and more information and examples but still it is getting really really hard to compete with Android and Apple.

In general it was an amazing experience and I got to know really smart and nice people during these 3 days. I was one of the lucky guys who got an Alpha B device so I can play and develop apps with it and for sure I will do it. I had to sign a non-disclosure agreement but that is OK with me :)
BlackBerry 10 Dev Alpha B prototype :)

Pretty much all the sessions are on demand if you are interested on learning what is new on this platform.

Thanks for the invite BlackBerry and hope to see you next year!

Thursday, September 13, 2012

Get File Line Count on Windows

This is just a small trick I have learned. Usually when you have to work with really really huge files you need to know the number of lines if has. For example, if you have to import a huge CSV file into a DB you need the count so you can verify the process or to have an idea of how long it will take. On Linux this is easy just a
wc -l [filename]
and that is all. On windows though it is different unless you install cygwin your command line options are limited. Specially if you have to do the job on customer's servers where you can't install what ever you want. So to do the trick on windows you have 2 options:
findstr /R /N "^" [filename] | find /C ":"
or
type [filename] | find /c /v "~~~"
The speed depends on how big the file is. I tried it on an 10GB CSV file and took around 15 minutes, both gave me the right result though. Hope it helps some one. Happy coding!

Tuesday, August 21, 2012

Installing VMWare Player on Ubuntu 12.04

I am still customizing my Ubuntu environment and every day is something new :) This time is VMWare Player. Mostly I use this to power up Virtual Windows machines to do some testing and to execute some proprietary software.

First, download the latest version of VMWare Player from here. At the time of this post the latest version was 4.0.4 and I used the 32 version. It should be the same if you have the 64 bit one. You might need to register in order to download the file and once you have it. It will probably be downloaded as .txt so you will have to rename it to .bundle

In order to run the installer we need to download some dependencies. To do that we execute this:
sudo apt-get install build-essential linux-headers-`uname -r`

Once all the dependencies are installed we need to give the installer execution permissions. We do that using this command:
chmod +x VMware-Player-4.0.4-744019.i386.bundle

Then we execute it:
sudo VMware-Player-4.0.4-744019.i386.bundle

At this point the installation window should show up and you just follow it
Starting installation
VMware stadistics
Checking for updates
Ready to install
Installing
Installation completed
 At this point VMware is installed but If you try to execute it, you will get the next error

we need to patch it
VMware error

To make it run on Ubuntu 12.04 we need to patch it. To do so we download the patch and edit it before we apply it just to reflect the version we are using. So let's do it
sudo apt-get install patch
wget http://webupd8.googlecode.com/files/vmware802fixlinux320.tar.gz
tar -xvf vmware802fixlinux320.tar.gz
We have have downloaded the patch and unpacked it. Now we need to edit the patch-modules_3.2.0.sh file. Change the plreqver value to the version you are installing in this case 4.0.4, save it and close it.

edit patch file
Finally we apply the patch:
sudo ./patch-modules_3.2.0.sh
applying the patch
And that is all. Now we launch the application again and we should see the License Agreement and once we Accept it the application will show up
License Agreement

VMware Player
It is not that complicated, but you do need some knowledge using command line. Hope it helps some one.

Happy Hacking!


Saturday, August 11, 2012

How to Install Oracle SQL Plus on Ubuntu 12.04

On my day to day work I have to deal with Oracle a lot! and since I am trying to use Ubuntu as my working environment I had to install a bunch of things one of them is SQL Plus. I like command line a lot and SQL plus is the best tool for Oracle so I had to have it.

The process is not so complicated. So let's start first you need to go to the Database Instant Client page and download the one specific to your platform. This post is for 32 bit so you have to download the Instant Client Downloads for Linux x86 one. It should be the same for the 54 bit though. From there you need to download these 2 rpm files:
  • Instant Client Package - Basic: All files required to run OCI, OCCI, and JDBC-OCI applications
  • Instant Client Package - SQL*Plus: Additional libraries and executable for running SQL*Plus with Instant Client
If you want, you can download the SDK :
  • Instant Client Package - SDK: Additional header files and an example makefile for developing Oracle applications with Instant Client
Since these are rpm files we need to convert them to deb, in order to that we need to install the alien utility
sudo apt-get install alien

Once that is done, go to the folder where the rpm files are located and execute the following
alien -i oracle-instantclient-basic*.rpm
alien -i oracle-instantclient-sqlplus*.rpm
alien -i oracle-instantclient-devel*.rpm

These commands will convert the rpm files on the fly and install them. Now you can test it by just typing sqlplus on the command line. For sure it will complain about a couple of things. One of them maybe about a missing libaio.so.1 . This one is easy, we just need to install it a simple
sudo apt-get install libaio1
The next error might be about missing libraries like libsqlplus.so. The libraries are there but SQL Plus can't find them. We need to add them to our PATH this is easy as well. We just need to create an oracle.conf file inside /etc/ld.so.conf.d/ so lets do that. I use vi because I like it, but you can use whichever editor you want to create the file.
sudo vi /etc/ld.so.conf.d/oracle.conf
then we add this:
/usr/lib/oracle/11.2/client/lib/
Notice that in my path I have 11.2 be careful with this. You can navigate and check that the path is correct for yours. 11.2 is the version we are installing. At the time of this post 11.2 was the latest one. Once you save the file we need to update the configuration by running:
sudo ldconfig

Now you should be ready to connect using:
sqlplus username/password@//dbhost:1521/SID

If you have problems with the SDK, you can check this post.
Hope it helps someone and happy coding!

Sunday, July 29, 2012

Installing Oracle JDK 6 in Ubuntu 12.04

My Ubuntu customization continues this time with Java. Everyone should know that Ubuntu does not come with Oracle-Sun JDK anymore instead it comes with open-jdk which I like but the projects I am working on does need Oracle-Sun jdk and version 5 or 6 so I did not have an option to install it.

You can download the version you want for the architecture you need from Oracles web site. by the time of this post the version I used was jdk-6u33 but it should apply to any version.

JDK Download
The next step is to unpack the bin file. You do it by executing these 2 lines:
chmod +x jdk-6u33-linux-i586.bin
./jdk-6u33-linux-i586.bin

You will see a jdk-6u33-linux-i586 folder as result of the last

Third step is to move the folder to a safe and standard place. To do that we use the next command
sudo mv jdk-6u33-linux-i586 /usr/lib/jvm/
Next we create a symbolic link, you know so you do not have to type jdk-6u33-linux-i586 all the time. We do that by typing
cd /usr/lib/jvm/
sudo ln -s  jdk-6u33-linux-i586 java
Finally, you need to set the environment variables. In my case update them since I already had openjdk installed but it will work either you have or not another version installed before. You need to do it for both java and javac
sudo update-alternatives --config javac
sudo update-alternatives --config java
Default jdk
You will need to choose the the option to the Oracle-Sun jdk you want and press enter.

To test this out you just type
java -version
javac -version

checking versions
and you should see the version you installed.

There is an easy way to this which is adding an extra repository. There are tons of PPAs that come with Oracle-SUN JDK these days, but as you know I like to have control of these things. The easy way is like this
sudo add-apt-repository ppa:webupd8team/java

sudo apt-get update

sudo apt-get install oracle-java6-installer

More information and nice guides can be found here, here and here.

Let me know if you have any questions.

Happy coding!

Wednesday, July 25, 2012

How to recover MS Windows 2003 Server admin password

From time to time I have to deal with Windows servers, you know the usual stuff, updates, configurations, slowness ;), etc. This time I got the server but I did not get the credentials to use it. I talk to the administrator and he couldn't remember and the ones he gave me did not work and it did not help that he was sitting in other country with 10 hours difference ( it was 2 am for me ).

Anyways, I had to use another approach. Usually when I have this problem I use an Ubuntu CD I have with me all the time, boot the machine and install chntpw and change/reset the admin's account password to blank to some other password, easy right?

This time though, it did not work because the server has a RAID 0 configuration and it was a domain controller secondary server. I am not an expert on this area but since it was a domain controller its credentials were store in the active directory configuration not really in the local machine and chntpw could not save the changes. As usual, I had to do it the long way.

I did some research I found that I was not alone and also found some articles explaining how to recover/reset your password some good links are this and this ( this last one needed access to the local admin account which I did not have either, might help some one though).

Finally, I found this thread where the author explains pretty much every situation related to my specific situation which was Windows 2003 server with AD configured.

The solution was to download and burn this tool, which is basically the next chntpw evolution. Just boot the computer using the CD (you can also get the USB version if you want) and you get a command line tool which has chntpw tool already. You mount the drive where windows is installed  and locate the SAM file usually in windows is in windows/system32/config/ folder. Once you are there you execute chnptw -h which will show you the version and all the options you have.
chntpw in action :)

I tried resetting the admin password but that did not work :( so I had to enable the guest account and increase its rights to admin level.  Once that was done I boot the machine normally logged in using the guest account and change the admin account, reset the password and created my own account with admin rights :)

You can use the next commands to do the same:
This will ist all users
chnptw -l SAM

To launch the interactive mode which is really helpful
chnptw -i SAM

One more thing, once you do all the changes do not forget to save the SAM file otherwise nothing will happen and also to safely umount the drive. This is very important I made the mistake very times and I had to it all over again and again.

Happy hacking and remember to use it for good reasons :)

Sunday, July 22, 2012

Installing and configuring Synergy on Ubuntu 12.04

I started using Ubuntu 12.04 and since I did a clean installation I had to re-install and configure a lot of my tools. One of them was Synergy. Synergy let's you share one mouse and keyboard among multiple computers, more or less like a KVM but with out the hardware.

I was using Mouse with out borders from Microsoft before, but as every tool that comes from them it only works with Windows and I needed something that could work on Windows and Linux and Synergy was the best option. What's more Synergy also works with Mac so If one day I get one, I know I would be able to use it there as well ;)

Anyways, the first thing I tried was to do a

sudo apt-get install synergy

It did work, but It installed an old stable version which seems to have some problems connecting to Windows 7. Like anything in life I had to do it the long way:


Download the beta version from its web site. Here it is the linkDownload the same version for each platform you wanna install it. by the time of this post 1.4.9 was the latest version.


Installing Synergy

Just double click on it and it will automatically open the Ubuntu Software Center. Click on install, you might need to enter your administrator password. Also, you will get a "The package is of bad quality" alert but you can press "Ignore and Install" to continue.


Alert window

Once it is installed you just execute it.

The configuration window will show up and you either configure the server interactively or use an specific configuration file. I chose the second option since I like writing my own configurations. Press Stop and just create a new document .synergy.conf and save it in your home directory then add these lines:

 
section: screens

        Venus:

        Marcelo:

end


section: aliases

        Venus:

                192.168.1.125

        Marcelo:

                192.168.1.131

end


section: links

        Venus:

               right = Marcelo

        Marcelo:

               left = Venus

end


If you notice there are 3 sections:
screens, where you define the number of screens you are going to use
aliases, here you need to assign each screen its IP address
links, is where you define the position of these screens. Which on is on the left, right, up, down, etc

One quick note here, you can try pinging the computer by its name and if that does not work you will have to add the computer and its ip to your hosts file. This in order to make Synergy work properly.
Windows:
C:/Windows/System32/etc/drivers/etc/hosts

Ubuntu:
etc/hosts


Finally, press Start again and make sure the option "Use existing configuration" is selected and then browse to the .synergy.conf file.


Config Window


The installation on Windows is so much simpler since we configured Ubuntu as server that means that the Keyboard and Mouse are plugged to the Ubuntu machine and it is sharing them with Windows.

I have been using this configuration for a week right now and I noticed some lag on the windows machine. I am not sure if it is because it is a beta version and it is not fully compatible with Windows 7 or because the server is on the Ubuntu or what, but sometimes the synergy process consumes more CPU than it should. I will monitoring and update this post if I find something else.

Please, let me know if you have any questions.

Now, I just wish there was a way to share mouse and keyboard with Chrome OS :)

Wednesday, July 18, 2012

How to Re-Create the Show desktop Icon on Windows

One of those useful tricks that is good to know. To be honest you can the same functionality by pressing and holding the Windows key the the letter D. Anyways I like having 3 buttons in the quick launch toolbar in windows, Chrome, Windows Commander and Show Desktop.

There are 2 ways to fix this:
The first one and easy is to download this tool and follow the steps.

The second one which I call the funny one need these steps:
Open any editor and paste this code:
[Shell]
Command=2
IconFile=explorer.exe,3
[Taskbar]
Command=ToggleDesktop

Save the file to your desktop as "Show desktop.scf"
Drag the icon to your quick launch toolbar and test it.


In reality the quick launch button uses the files in this folder:
For windows XP, 2003
%userprofile%\Application Data\Microsoft\Internet Explorer\Quick Launch

For windows vista, 7 and server 2008%userprofile%\AppData\Roaming\Microsoft\Internet Explorer\Quick Launch


Hope it helps Some one. Happy hacking :)

Saturday, July 14, 2012

Thimble

Online editors and IDE's are becoming more popular every year which makes sense since we are moving from a desktop era to a cloud era. Having everything in the cloud and taking it with you everywhere is the dream. You just need internet connection and you all your stuff.

Mozilla is also trying to get into the cloud editor game they released Thimble which is a online HTML/CSS editor. Once you launch the application you can see 2 divisions, one for coding and the other one to see the preview in the real time. The editor lacks from auto-completion but it give you hints if you place the mouse over a tag.

Thimble in action

Once you are done you can even publish your work so every once can see it. It is a perfect online editor your goal is to learn the basics of HTML/CSS or if you need to edit something quick.

Happy coding!!!

Friday, July 13, 2012

Precise Pangolin first impressions

As you may know Ubuntu 12.0.4 a.k.a Precise Pangolin has been out for about 3 months maybe more, but just now I had the opportunity to really install and test it.  I tried to do a RAID 0 installation but for some reason it did not like it and the boot loader couldn't be installed. It seems the installer did not recognize the RAID configuration. My research did not help and I couldn't spend too much time on it so I decided to just remove the RAID configuration from the Bios and do a normal installation.


The installation was pretty straight forward. You just insert the CD and choose "Install Ubuntu" once you see this screen.

Install option
I do not remember if previous versions did this step but this time I got a verification test in order to see if my computers meets the required hardware, luckily it did.
hardware verification
Then comes the classic option to install it in the whole disc or choose a different partition. I checked all disk since this machine is going to be 100% Ubuntu :)

installation selection
This part was supposed to install it in the RAID configuration but it never worked.
disk selection
Then installation starts copying and downloading files.
installing
The installer makes some stops, one of them is to choose time zone.
time zone
The next stop is for language selection to be used in the keyboard.
keyboard language
Another stop is to configure computer name, user name password.
user configuration
Then comes more installing and downloading.


The whole process takes about an hour and it depends on you internet connection. After that comes the painful process of installing, configuration and customization like installing ssh server, vnc server, development tools and lots of things that I will explaining in the next posts.

This is my last result, pretty good isn't it? :) This Ubuntu version it is really amazing, I am still getting used to the new UI though. Unity tries to simulate Apple's universal search so can find applications, files, etc really fast. Unfortunately you do really need graphics drivers properly installed otherwise the experience is really poor and slow. It really requires a lot of memory i am sure that is why it checks for minimum amount of RAM. I will post more as I write about installing some more tools but so far I am really happy with this version :)

Would have been better if the RAID configuration had worked though.

Ubuntu 12.04 :)
 
Happy coding :)

Tuesday, July 10, 2012

Google IO 2012 recap

Google IO 2012 is gone right now and even though this year sold out in less than 30 minutes I was able to get a ticket by participating the last call Google Code Jam :) which made me realize that i need more practice solving algorithms. The contest was relatively easy but still I struggled a lot in things I should not.

Anyways, the same as last year Google IO was full of surprises and tons of give aways :)  This year we got the complete Nexus family and a ChromeBox and some of us got the ADK so we can built android accessories ( I can accept any ides here ).

This year was a little bit different since I had the chance to be part of the GDG summit Google holds every year in its main campus. This event is special for GDG organizers and this year thanks to some friends I am the new organizer for GDG La Paz and GDG Cochabamba :) we are small but we have a strong enthusiasm to grow and organize more events. If you do not know what a GDG is, I encourage you to follow this link :) for sure there is not near you.

Van Riper and me in front of the Building 44 a.k.a Android
Besides all the free gadgets Google IO is a great place to be if you like Google technologies. This year I focused on Google Apps Script, Google Drive and of course Android. Most of the videos are already on the Google Developers YouTube channel and you can watch them and learn the new functionalities they have. There are sessions from level 101 to most advanced ones.

Now I am back to reality and for sure I will try to post more.

Happy coding!

Tuesday, March 13, 2012

Google I/O 2012 Registration News

Finally, Google has officially announced Google I/O 2012 registration start date. It starts this March 27th at 7 am PDT so that means 10 am Eastern time.

This year Google I/O is going to be 3 days instead of 2 and also the fees have increased a lot and the worst part, there is no early bird fee :(. Students and Academia ticket are 300$ and general tickets are 900$, a huge increase from last year.

Meanwhile you can also play building a Rube Goldberg machine and if it is good, it might be featured in Google I/O 2012.


Last year Google I/O tickets sold out in less than one hour so be ready for that day ;)

Who is going this year? for sure I will try to make :)

Thursday, February 16, 2012

Porting Android Applications to BlackBerry PlayBook

Every mobile developer's dream is to port their apps to every platform, Android, iPhone, BlackBerry, Windows Phone, etc at least that is my dream. Last year I did the first step by launching my Android app in the Android Market. Since then I have been busy with work and my travels but I got the time to make the next step. I finally ported my Android app to the BlackBerry PlayBook Tablet :) :)

The process to publish your app in the BlackBerry App World is a little bit complicated for sure more complicated than the Android Market.

The first thing you want to do is to make sure you can port your app, sadly not everything is supported; for now you can only port Android apps targeted to Android 2.3.3 API revision 10 a.k.a GingerBread and even if your app is using that specific version, the list of unsupported APIs is long, you can check the complete list here and here.

The easiest way to test if your app is portable, is using the command line tool, just download it execute this:

apk2barVerifier <apk-dir>|<apk-file> [<Android SDK path>]

The tool will tell generate a .sum file and it tell you if you have any errors and one thing for sure is that the tool does not give a lot of information about what is wrong with your application. If it is failing, it will only tell you that it found errors and that is all, sucks, isn't it? The very first time I run it the message i got was this one:


minLaunchable-activity-count:impact=5:1:found=0
impact-summary: [5]=1; [4]=0; [3]=0; [2]=0; [1]=0;
ChmbrsNotes.apk: [5]=1; [4]=0; [3]=0; [2]=0; [1]=0;
Impact Legend: [5]=Severe; [4]=High /context; [3]=Medium /context; [2]=Medium-low /context; [1]=Minor;


It says I have one severe error but that is all. I did not know where to look, change or remove. I had to go piece by piece in my Manifest file and remove every part and test. It sucks!

Once you solve all your compatibility issues it is time to deploy and debug in the simulator. In order to debug it you can download the plugin for eclipse which also comes with the command line tool integrated it which is handy since you can check your progress every time. The plugin allows you to do a couple of things like packaging, repackaging, debug, even sign your app for the BlackBerry App World.

Before you set up your plugin I recommend getting your keys and also 
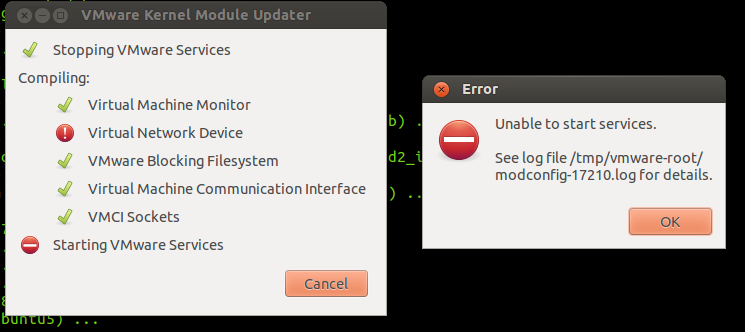
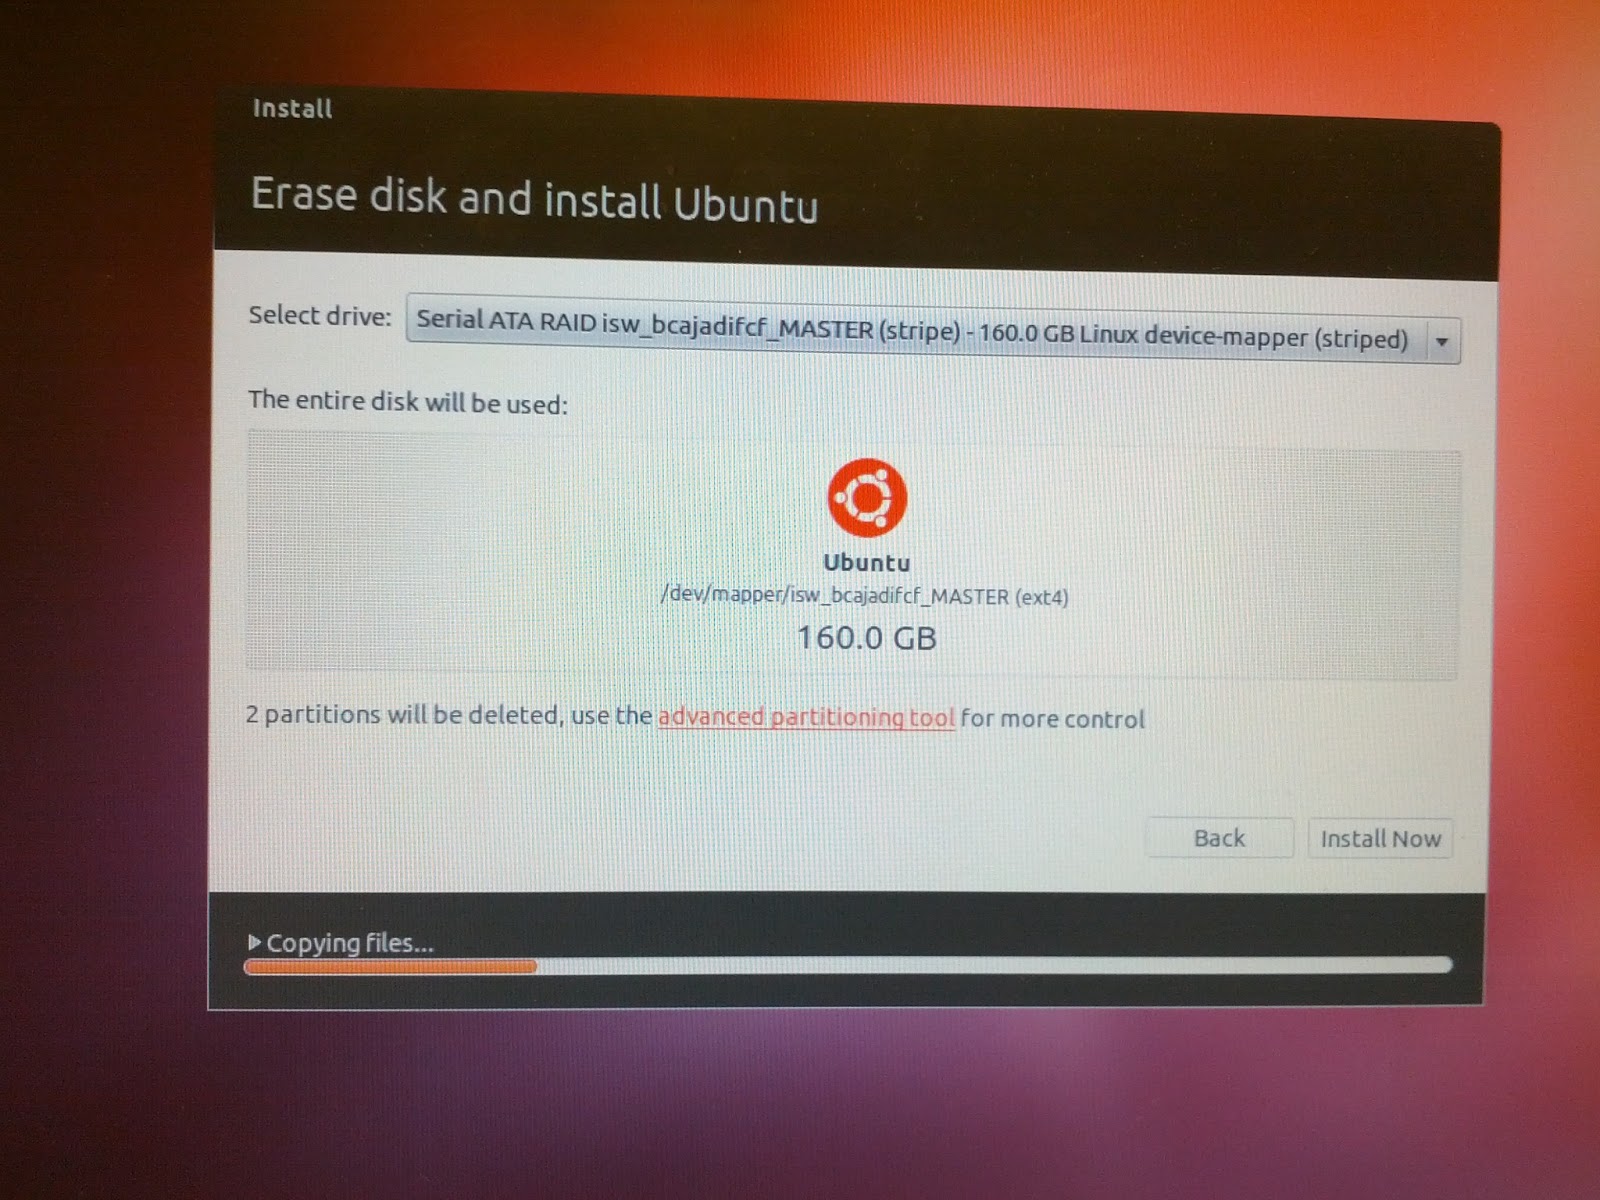
download VMPlayer and the image to load the simulator. Once you request your keys probably will take a couple of hours to get approved so request them with time also you will need the keys to set up the eclipse plugin and the simulator. It is weird they request keys to deploy apps in the simulator but once you are done testing you can sign your app right away. In Android it signs the applications with a debug key and once you are ready to upload it to the Android Market you create your key. So either way you need keys so i guess it is fine.

This video explains pretty much everything until this step.


What this video does not say is that it takes a lot of time to register and get approved as BlackBerry Vendor. It took like 2 days for me to get the approval and they even asked me for a Photo ID scan so I can prove my identity. You can register yourself here and probably you want to do it with time.

Once you are registered you need to sign and submit your application for approval. In order to do that you need fill out more forms, pick an application name ( if it is available) upload bunch of promotional images, icons, a nice description and decide country and carriers availability and of course if you are going to charge for it or not. Mine is free so I do not know what the process is for paid applications probably you will need to set up Paypal or any other way of payment. It took another 2 days to get the approval and once you get it you are allowed to publish your application for sale, the good thing though is that everything is free there is no registration fee or anything like that.

You can get all the information and tools in the BlackBerry Runtime for Android Apps web page. It is still in beta and their documentation could have been better and also the forums did not help at all with my compatibility issue but at least they have all the tools out there. I wish the could support more than Android 2.3.3, at least it is a nice start.

I guess once you see it online and ready to be downloaded you feel like you have accomplished something :)

Chmbrs NotePad in the BlackBerry App World :)

Hope it helps some one, happy coding :)