Showing posts with label ubuntu. Show all posts

Tuesday, August 21, 2012

Installing VMWare Player on Ubuntu 12.04

I am still customizing my Ubuntu environment and every day is something new :) This time is VMWare Player. Mostly I use this to power up Virtual Windows machines to do some testing and to execute some proprietary software.

First, download the latest version of VMWare Player from here. At the time of this post the latest version was 4.0.4 and I used the 32 version. It should be the same if you have the 64 bit one. You might need to register in order to download the file and once you have it. It will probably be downloaded as .txt so you will have to rename it to .bundle

In order to run the installer we need to download some dependencies. To do that we execute this:
sudo apt-get install build-essential linux-headers-`uname -r`

Once all the dependencies are installed we need to give the installer execution permissions. We do that using this command:
chmod +x VMware-Player-4.0.4-744019.i386.bundle

Then we execute it:
sudo VMware-Player-4.0.4-744019.i386.bundle

At this point the installation window should show up and you just follow it
Starting installation
VMware stadistics
Checking for updates
Ready to install
Installing
Installation completed
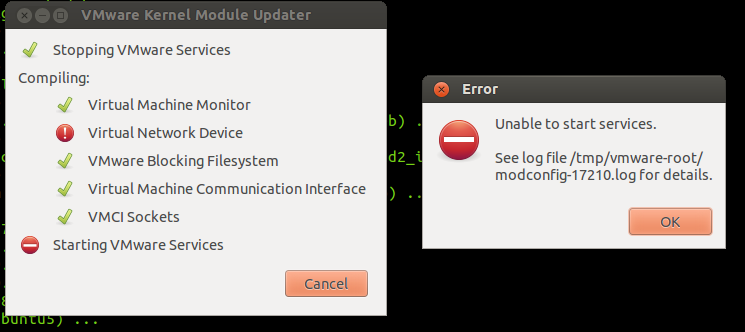
 At this point VMware is installed but If you try to execute it, you will get the next error

we need to patch it
VMware error

To make it run on Ubuntu 12.04 we need to patch it. To do so we download the patch and edit it before we apply it just to reflect the version we are using. So let's do it
sudo apt-get install patch
wget http://webupd8.googlecode.com/files/vmware802fixlinux320.tar.gz
tar -xvf vmware802fixlinux320.tar.gz
We have have downloaded the patch and unpacked it. Now we need to edit the patch-modules_3.2.0.sh file. Change the plreqver value to the version you are installing in this case 4.0.4, save it and close it.

edit patch file
Finally we apply the patch:
sudo ./patch-modules_3.2.0.sh
applying the patch
And that is all. Now we launch the application again and we should see the License Agreement and once we Accept it the application will show up
License Agreement

VMware Player
It is not that complicated, but you do need some knowledge using command line. Hope it helps some one.

Happy Hacking!


Saturday, August 11, 2012

How to Install Oracle SQL Plus on Ubuntu 12.04

On my day to day work I have to deal with Oracle a lot! and since I am trying to use Ubuntu as my working environment I had to install a bunch of things one of them is SQL Plus. I like command line a lot and SQL plus is the best tool for Oracle so I had to have it.

The process is not so complicated. So let's start first you need to go to the Database Instant Client page and download the one specific to your platform. This post is for 32 bit so you have to download the Instant Client Downloads for Linux x86 one. It should be the same for the 54 bit though. From there you need to download these 2 rpm files:
  • Instant Client Package - Basic: All files required to run OCI, OCCI, and JDBC-OCI applications
  • Instant Client Package - SQL*Plus: Additional libraries and executable for running SQL*Plus with Instant Client
If you want, you can download the SDK :
  • Instant Client Package - SDK: Additional header files and an example makefile for developing Oracle applications with Instant Client
Since these are rpm files we need to convert them to deb, in order to that we need to install the alien utility
sudo apt-get install alien

Once that is done, go to the folder where the rpm files are located and execute the following
alien -i oracle-instantclient-basic*.rpm
alien -i oracle-instantclient-sqlplus*.rpm
alien -i oracle-instantclient-devel*.rpm

These commands will convert the rpm files on the fly and install them. Now you can test it by just typing sqlplus on the command line. For sure it will complain about a couple of things. One of them maybe about a missing libaio.so.1 . This one is easy, we just need to install it a simple
sudo apt-get install libaio1
The next error might be about missing libraries like libsqlplus.so. The libraries are there but SQL Plus can't find them. We need to add them to our PATH this is easy as well. We just need to create an oracle.conf file inside /etc/ld.so.conf.d/ so lets do that. I use vi because I like it, but you can use whichever editor you want to create the file.
sudo vi /etc/ld.so.conf.d/oracle.conf
then we add this:
/usr/lib/oracle/11.2/client/lib/
Notice that in my path I have 11.2 be careful with this. You can navigate and check that the path is correct for yours. 11.2 is the version we are installing. At the time of this post 11.2 was the latest one. Once you save the file we need to update the configuration by running:
sudo ldconfig

Now you should be ready to connect using:
sqlplus username/password@//dbhost:1521/SID

If you have problems with the SDK, you can check this post.
Hope it helps someone and happy coding!

Sunday, July 29, 2012

Installing Oracle JDK 6 in Ubuntu 12.04

My Ubuntu customization continues this time with Java. Everyone should know that Ubuntu does not come with Oracle-Sun JDK anymore instead it comes with open-jdk which I like but the projects I am working on does need Oracle-Sun jdk and version 5 or 6 so I did not have an option to install it.

You can download the version you want for the architecture you need from Oracles web site. by the time of this post the version I used was jdk-6u33 but it should apply to any version.

JDK Download
The next step is to unpack the bin file. You do it by executing these 2 lines:
chmod +x jdk-6u33-linux-i586.bin
./jdk-6u33-linux-i586.bin

You will see a jdk-6u33-linux-i586 folder as result of the last

Third step is to move the folder to a safe and standard place. To do that we use the next command
sudo mv jdk-6u33-linux-i586 /usr/lib/jvm/
Next we create a symbolic link, you know so you do not have to type jdk-6u33-linux-i586 all the time. We do that by typing
cd /usr/lib/jvm/
sudo ln -s  jdk-6u33-linux-i586 java
Finally, you need to set the environment variables. In my case update them since I already had openjdk installed but it will work either you have or not another version installed before. You need to do it for both java and javac
sudo update-alternatives --config javac
sudo update-alternatives --config java
Default jdk
You will need to choose the the option to the Oracle-Sun jdk you want and press enter.

To test this out you just type
java -version
javac -version

checking versions
and you should see the version you installed.

There is an easy way to this which is adding an extra repository. There are tons of PPAs that come with Oracle-SUN JDK these days, but as you know I like to have control of these things. The easy way is like this
sudo add-apt-repository ppa:webupd8team/java

sudo apt-get update

sudo apt-get install oracle-java6-installer

More information and nice guides can be found here, here and here.

Let me know if you have any questions.

Happy coding!

Sunday, July 22, 2012

Installing and configuring Synergy on Ubuntu 12.04

I started using Ubuntu 12.04 and since I did a clean installation I had to re-install and configure a lot of my tools. One of them was Synergy. Synergy let's you share one mouse and keyboard among multiple computers, more or less like a KVM but with out the hardware.

I was using Mouse with out borders from Microsoft before, but as every tool that comes from them it only works with Windows and I needed something that could work on Windows and Linux and Synergy was the best option. What's more Synergy also works with Mac so If one day I get one, I know I would be able to use it there as well ;)

Anyways, the first thing I tried was to do a

sudo apt-get install synergy

It did work, but It installed an old stable version which seems to have some problems connecting to Windows 7. Like anything in life I had to do it the long way:


Download the beta version from its web site. Here it is the link. Download the same version for each platform you wanna install it. by the time of this post 1.4.9 was the latest version.
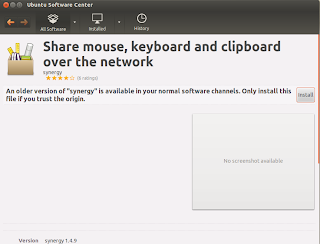

Installing Synergy

Just double click on it and it will automatically open the Ubuntu Software Center. Click on install, you might need to enter your administrator password. Also, you will get a "The package is of bad quality" alert but you can press "Ignore and Install" to continue.
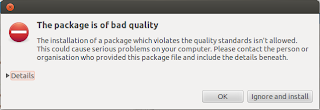

Alert window

Once it is installed you just execute it.

The configuration window will show up and you either configure the server interactively or use an specific configuration file. I chose the second option since I like writing my own configurations. Press Stop and just create a new document .synergy.conf and save it in your home directory then add these lines:

 
section: screens

        Venus:

        Marcelo:

end


section: aliases

        Venus:

                192.168.1.125

        Marcelo:

                192.168.1.131

end


section: links

        Venus:

               right = Marcelo

        Marcelo:

               left = Venus

end


If you notice there are 3 sections:
screens, where you define the number of screens you are going to use
aliases, here you need to assign each screen its IP address
links, is where you define the position of these screens. Which on is on the left, right, up, down, etc

One quick note here, you can try pinging the computer by its name and if that does not work you will have to add the computer and its ip to your hosts file. This in order to make Synergy work properly.
Windows:
C:/Windows/System32/etc/drivers/etc/hosts

Ubuntu:
etc/hosts


Finally, press Start again and make sure the option "Use existing configuration" is selected and then browse to the .synergy.conf file.
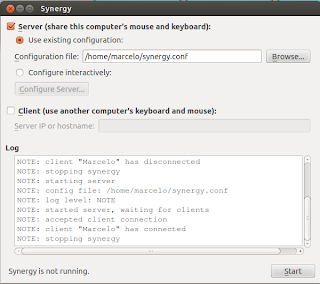

Config Window


The installation on Windows is so much simpler since we configured Ubuntu as server that means that the Keyboard and Mouse are plugged to the Ubuntu machine and it is sharing them with Windows.

I have been using this configuration for a week right now and I noticed some lag on the windows machine. I am not sure if it is because it is a beta version and it is not fully compatible with Windows 7 or because the server is on the Ubuntu or what, but sometimes the synergy process consumes more CPU than it should. I will monitoring and update this post if I find something else.

Please, let me know if you have any questions.

Now, I just wish there was a way to share mouse and keyboard with Chrome OS :)

Friday, July 13, 2012

Precise Pangolin first impressions

As you may know Ubuntu 12.0.4 a.k.a Precise Pangolin has been out for about 3 months maybe more, but just now I had the opportunity to really install and test it.  I tried to do a RAID 0 installation but for some reason it did not like it and the boot loader couldn't be installed. It seems the installer did not recognize the RAID configuration. My research did not help and I couldn't spend too much time on it so I decided to just remove the RAID configuration from the Bios and do a normal installation.


The installation was pretty straight forward. You just insert the CD and choose "Install Ubuntu" once you see this screen.

Install option
I do not remember if previous versions did this step but this time I got a verification test in order to see if my computers meets the required hardware, luckily it did.
hardware verification
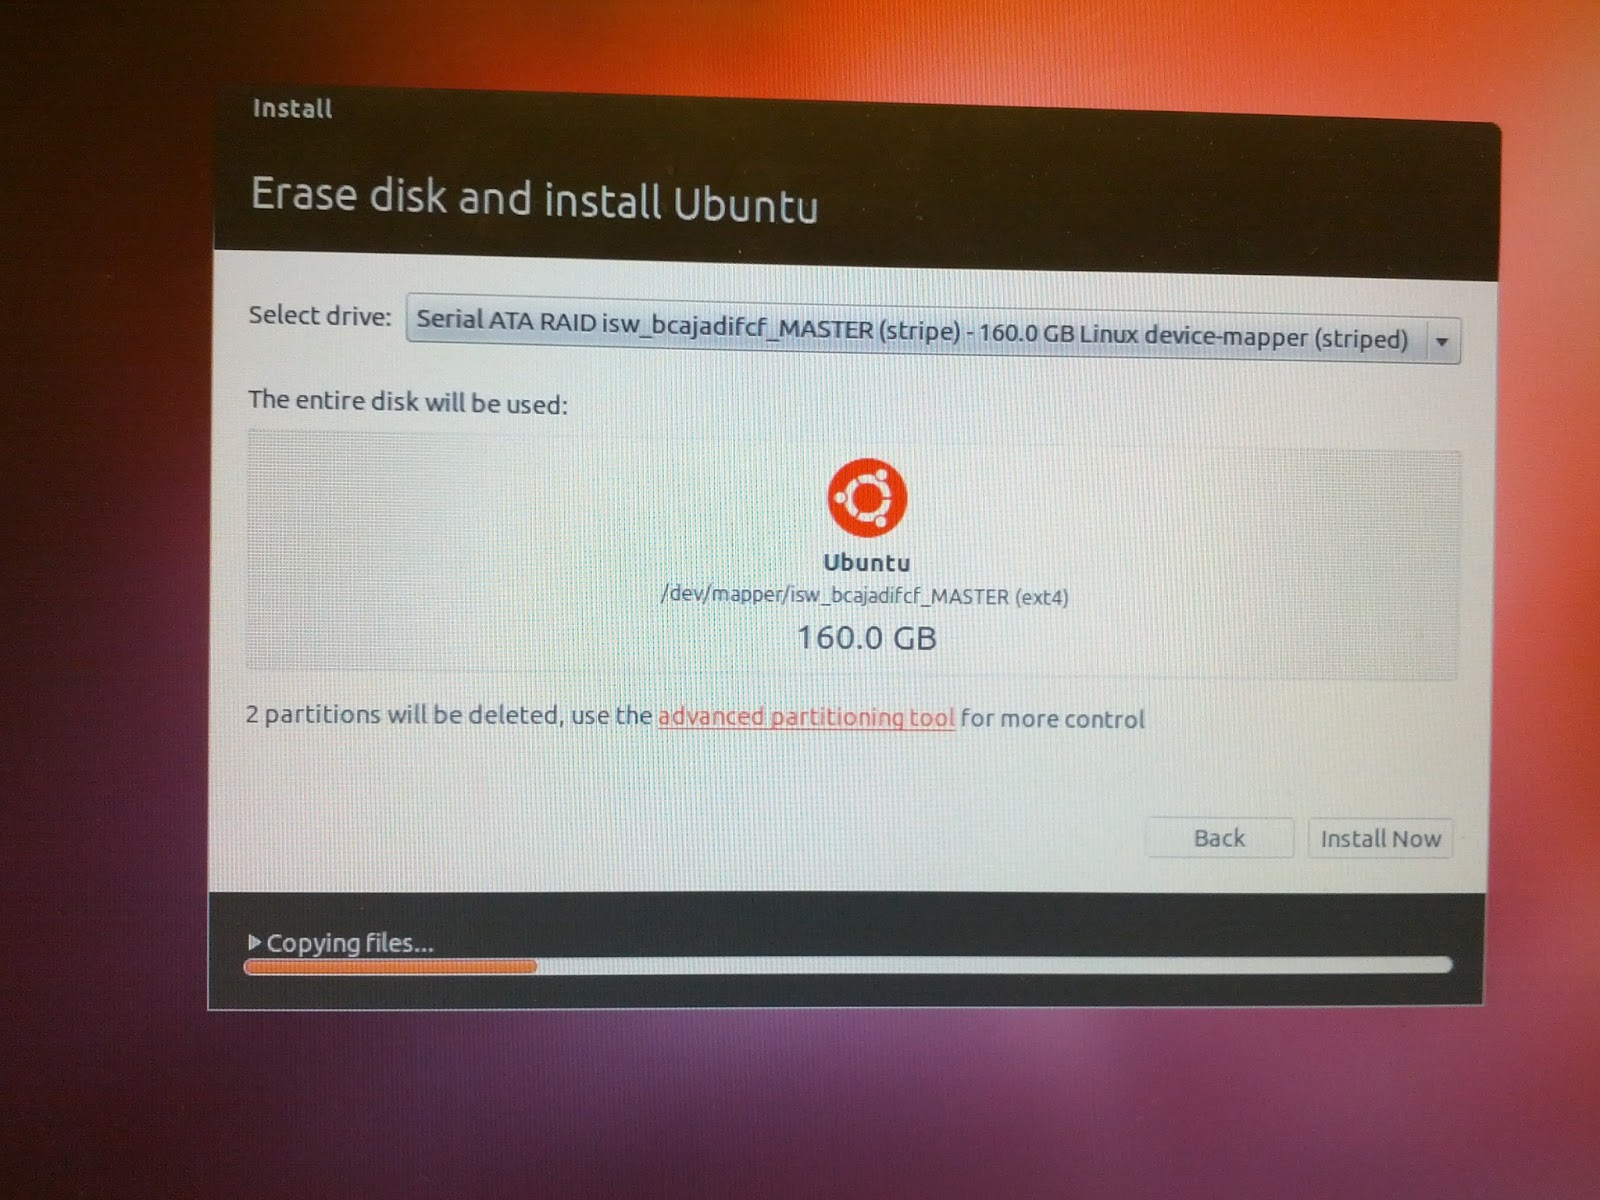
Then comes the classic option to install it in the whole disc or choose a different partition. I checked all disk since this machine is going to be 100% Ubuntu :)

installation selection
This part was supposed to install it in the RAID configuration but it never worked.
disk selection
Then installation starts copying and downloading files.
installing
The installer makes some stops, one of them is to choose time zone.
time zone
The next stop is for language selection to be used in the keyboard.
keyboard language
Another stop is to configure computer name, user name password.
user configuration
Then comes more installing and downloading.


The whole process takes about an hour and it depends on you internet connection. After that comes the painful process of installing, configuration and customization like installing ssh server, vnc server, development tools and lots of things that I will explaining in the next posts.

This is my last result, pretty good isn't it? :) This Ubuntu version it is really amazing, I am still getting used to the new UI though. Unity tries to simulate Apple's universal search so can find applications, files, etc really fast. Unfortunately you do really need graphics drivers properly installed otherwise the experience is really poor and slow. It really requires a lot of memory i am sure that is why it checks for minimum amount of RAM. I will post more as I write about installing some more tools but so far I am really happy with this version :)

Would have been better if the RAID configuration had worked though.

Ubuntu 12.04 :)
 
Happy coding :)

Saturday, November 5, 2011

Configure X11VNC in Ubuntu 11.10 a.k.a Oneiric Ocelot

As you should know the new Ubuntu version is out almost one month already but I just got time to play with it. The upgrade  process as usual was easy. It took some hours but it was smooth. The first thing I did was to remove Ubuntu Unity. I might write an entire post about it but right now I am just going to say that I hate it!

When everything finished I noticed I could not remote desktop it using VNC as I always do then the problems started. Searching  in Google I found that this is a known issue in this version and a lot of users keep complaining about it ( myself among them ).

Looking for another options to access my server remotely I found that X11VNC was my best option. The best thing about it is its great options it has for command line control and the best thing is that even if there is no user log in into the terminal you can still start the server, this was a huge limitation about Vino-VNC (the default VNC server Ubuntu ships). First a user has to log in so the server could start, there was no way to start it from command line or ssh. It demands to have a monitor attached.

Anyways after the usual "sudo-apt install X1vnc" to install the required x11vnc packages these are the commands you need to run in order to make it work:

if there is user a user already logged in:
x11vnc -display :0
if nobody is logged in:
sudo x11vnc -auth /var/run/lightdm/root/:0 - display :0
If you notice, you will need to run it as super user since that path needs super user privileges.

The -auth parameter needs the path to the display manger if no one is logged into, but there is a greeter login program like gdm ( Ubuntu ), kdm ( Kubuntu ), xdm ( Xubuntu) , etc running so it might vary on different platforms. You can try 2 things:

This will try to guess the path
x11vnc -auth guess -display :0
Sometimes executing:
ps wwwaux | grep auth
can show you the path to that file, in my case it did.

This tool has tons of options but one I really found  useful is the geometry option, which lets scale the screen to fit your needs or if you are connecting from slow internet bandwidth :
x11vnc -display :0 -geometry 1024x764
Once the server is up and running you should something like this:
The VNC desktop is [YOUR SERVER NAME]:0

PORT=5900
And you are all set and ready to connect using your favorite client.

Connecting to the login screen

You can find all the documentation and all the options you can use in this page and here

Hopes it helps while we wait for the bug to be fixed.

Happy coding :)

Saturday, April 30, 2011

Ubuntu 11.04 a.k.a. Natty Narwhal

This week  I got time to upgrade my personal server which was running Ubuntu 10.10 to the new version 11.04 a.k.a. Natty Narwhal. The process wasn't really difficult as many years ago when it used to take hours! and a lot of CD's.

This time I just launched the Update Manager and the notification for the new version was already there and asking if I wanted to install it. You just need to run this command:
sudo update-manager -d

New Upgrade :)

Rlease Notes

Preparing upgrade

I pressed upgrade and after asking for the root user it started the whole process. It removed a lot of old packages and replace others with the new version. One think I really like it is that I made some modifications to some config files and the upgrade tool asked me if I wanted to preserve the old ones or replace them with the new ones. This was great because I was afraid I had to re-do that work again.
Summary of things to do
The whole process might have taken around 2 hours mostly because the Ubuntu servers were so busy with all the installations that sometimes it was really slow to download the packages needed. The traffic must have been really heavy.
Installing new version
Some Clean up
At the end everything was fine but since it is a server I couldn't run the new UI Unity it seems I have to configure my graphics card and makes sense since Unity uses Compiz to run so I might need to take some more time to fix it, either way I like the classic UI.
New Scroll UI
Another new things are the new Ubuntu Software Center , Ubuntu One which lets you synchronize everything between computers and everyone gets 2GB for free, it also lets you stream your music. I need to try this one although 2GB is not too much.
Ubuntu Control Center
Ubuntu One
Talking about software it comes with Nautilus 2.32.2, GNOME 2.32.1, Firefox 4.0, Shotwell 0.9.2, Empathy 2.34.0, Banshee 2.0, LibreOffice 3.3.2, Evolution 2.32.2, Gwibber 3.0.0.1, Xorg Server 1.10.1, X.Org 7.6, Totem 2.32.2, Compiz 0.9.4, GDM 2.32.1, GRUB 1.99 RC1, Mesa 7.10, New artwork, Linux kernel 2.6.38.3, Compiz Fusion 0.9.4 and many more. They did replace OpenOffice with LibnreOffice.
LibreOffice
You can read the complete set of new features in its official page. I like Ubuntu and I would like it more once I am able to configure and run Unity.

Enjoy the new version :)

Monday, February 21, 2011

Port forwarding and VNC configuration

Weeks ago I got a free computer from home, you know they are going to get new ones and they are giving away the old ones. Anyways this new computer is not really the best thing. It must a Pentium 4 with 2 GB of RAM and it came with out OS. I installed Ubuntu 10.10 on it since it seems my Linux knowledge has been failing.

It is the first desktop I have since a lot of time and right now is working like a dedicated server. It was good but one thing was missing. I couldn't access it from outside my home network which sucks like from work for example. Especially my NAS ( Network Attached Storage ) which has a lot of information, installers and pretty much everything I have.

I did some research and at the end everything worked just fine and these are the steps to do it if you want something similar. This is working just fine on Ubuntu, but it should also work with Windows or Mac.
  • Install ssh server if you want to use command line which I like :) or if you want to remote desktop, you can install tightVNC which has the server and the viewer versions. Ubuntu comes already with VINO which is its built in VNC server which is good but has some limitations.
  • Look into your routers documentation and find a way to configure port forwarding. This basically redirects traffic based on ports and IP's. You open a port and a IP that is going to receive the request. It is worth saying that opening ports in your router is a security breach and you need to be very careful when doing this, like having a good firewall, really good passwords, etc etc. Having said that let's continue. Once you know how to enable port forwarding in your router you need to open two ports: 22 for ssh and 5900 for VNC. These are the default ports these application work with, but can configure the application to work in a different port. In VINO it is a little bit difficult I do not know about tightVNC, it must easier though. This is how it should look like.
  • Once you finish the configuration you need to restart the server and router so the new configuration would work.
  • If everything is working fine, it is time to test. In oder to test it you can ssh your server using your public which you can find by using whatismyIP or any tool like that. The easiest way to test using Windows is using Putty which is a free ssh and telnet client. If it works, you should be able to log in using your Ubuntu user name and password.
  • If you want to test it using VNC, you will need to install tightVNC client in windows and connect using your public IP and again you should be able to log in using your same Ubuntu credentials.
More information about configuring port forwarding with VNC can be found here. It should be a pretty straight forward configuration, but again opening ports to the world can be really dangerous for your security so be very careful.

Tuesday, April 17, 2007

Windows Vista vs Ubuntu Beryl


No me pude aguantar mostrarles este video que encontre en las bitacoras de Ubuntu

Mucho ojo con el final.
salu2.

Wednesday, March 28, 2007

Novedades de Ubuntu Feisty Fawn

Hola a todos,

Ya todos deben saber sobre la nueva versión de Ubuntu que se nos viene en unas cuantas semanas mas, trabajan rápido estos chicos, en fin me puse a revisar que de nuevo traerá esta nueva versión, vengo usando Ubuntu mas o menos un año y francamente no me quejo si mi hermanita puede usarlo tonces valía la pena dejarlo un buen tiempo.

Navegando navegando encontré montón de lugares donde me daban varios reviews de esta nueva versión y con todo detalle y gráficos. Algunas de las cosas que me gustaron que vengan son:

On the Desktop: GNOME 2.18, OpenOffice.org 2.2.0rc3, X.org 7.2
On the Server: Apache 2.2, PostgreSQL 8.2, PHP 5.2.1,

Además cambiaron su control center y su install codec wizard se ve buenísimo, mejoraron su soporte para redes, además que tiene utilitarios para montar discos, ver información, búsqueda y un help center distinto. En fin aún no se si pasarme a la versión beta o esperar unas semanas al release, en realidad no sé si pueda aguantarme ;)

Para los que quieren leer mas sobre el tema les dejo acá un link de los muchos que hay por la web.
Alguien ya se instalo la versión beta? que les pareció?

salu2.