Tuesday, August 21, 2012

Installing VMWare Player on Ubuntu 12.04

I am still customizing my Ubuntu environment and every day is something new :) This time is VMWare Player. Mostly I use this to power up Virtual Windows machines to do some testing and to execute some proprietary software.

First, download the latest version of VMWare Player from here. At the time of this post the latest version was 4.0.4 and I used the 32 version. It should be the same if you have the 64 bit one. You might need to register in order to download the file and once you have it. It will probably be downloaded as .txt so you will have to rename it to .bundle

In order to run the installer we need to download some dependencies. To do that we execute this:
sudo apt-get install build-essential linux-headers-`uname -r`

Once all the dependencies are installed we need to give the installer execution permissions. We do that using this command:
chmod +x VMware-Player-4.0.4-744019.i386.bundle

Then we execute it:
sudo VMware-Player-4.0.4-744019.i386.bundle

At this point the installation window should show up and you just follow it
Starting installation
VMware stadistics
Checking for updates
Ready to install
Installing
Installation completed
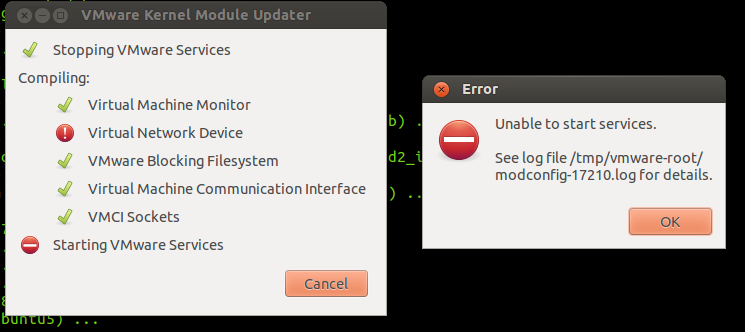
 At this point VMware is installed but If you try to execute it, you will get the next error

we need to patch it
VMware error

To make it run on Ubuntu 12.04 we need to patch it. To do so we download the patch and edit it before we apply it just to reflect the version we are using. So let's do it
sudo apt-get install patch
wget http://webupd8.googlecode.com/files/vmware802fixlinux320.tar.gz
tar -xvf vmware802fixlinux320.tar.gz
We have have downloaded the patch and unpacked it. Now we need to edit the patch-modules_3.2.0.sh file. Change the plreqver value to the version you are installing in this case 4.0.4, save it and close it.

edit patch file
Finally we apply the patch:
sudo ./patch-modules_3.2.0.sh
applying the patch
And that is all. Now we launch the application again and we should see the License Agreement and once we Accept it the application will show up
License Agreement

VMware Player
It is not that complicated, but you do need some knowledge using command line. Hope it helps some one.

Happy Hacking!


Saturday, August 11, 2012

How to Install Oracle SQL Plus on Ubuntu 12.04

On my day to day work I have to deal with Oracle a lot! and since I am trying to use Ubuntu as my working environment I had to install a bunch of things one of them is SQL Plus. I like command line a lot and SQL plus is the best tool for Oracle so I had to have it.

The process is not so complicated. So let's start first you need to go to the Database Instant Client page and download the one specific to your platform. This post is for 32 bit so you have to download the Instant Client Downloads for Linux x86 one. It should be the same for the 54 bit though. From there you need to download these 2 rpm files:
  • Instant Client Package - Basic: All files required to run OCI, OCCI, and JDBC-OCI applications
  • Instant Client Package - SQL*Plus: Additional libraries and executable for running SQL*Plus with Instant Client
If you want, you can download the SDK :
  • Instant Client Package - SDK: Additional header files and an example makefile for developing Oracle applications with Instant Client
Since these are rpm files we need to convert them to deb, in order to that we need to install the alien utility
sudo apt-get install alien

Once that is done, go to the folder where the rpm files are located and execute the following
alien -i oracle-instantclient-basic*.rpm
alien -i oracle-instantclient-sqlplus*.rpm
alien -i oracle-instantclient-devel*.rpm

These commands will convert the rpm files on the fly and install them. Now you can test it by just typing sqlplus on the command line. For sure it will complain about a couple of things. One of them maybe about a missing libaio.so.1 . This one is easy, we just need to install it a simple
sudo apt-get install libaio1
The next error might be about missing libraries like libsqlplus.so. The libraries are there but SQL Plus can't find them. We need to add them to our PATH this is easy as well. We just need to create an oracle.conf file inside /etc/ld.so.conf.d/ so lets do that. I use vi because I like it, but you can use whichever editor you want to create the file.
sudo vi /etc/ld.so.conf.d/oracle.conf
then we add this:
/usr/lib/oracle/11.2/client/lib/
Notice that in my path I have 11.2 be careful with this. You can navigate and check that the path is correct for yours. 11.2 is the version we are installing. At the time of this post 11.2 was the latest one. Once you save the file we need to update the configuration by running:
sudo ldconfig

Now you should be ready to connect using:
sqlplus username/password@//dbhost:1521/SID

If you have problems with the SDK, you can check this post.
Hope it helps someone and happy coding!

Sunday, July 29, 2012

Installing Oracle JDK 6 in Ubuntu 12.04

My Ubuntu customization continues this time with Java. Everyone should know that Ubuntu does not come with Oracle-Sun JDK anymore instead it comes with open-jdk which I like but the projects I am working on does need Oracle-Sun jdk and version 5 or 6 so I did not have an option to install it.

You can download the version you want for the architecture you need from Oracles web site. by the time of this post the version I used was jdk-6u33 but it should apply to any version.

JDK Download
The next step is to unpack the bin file. You do it by executing these 2 lines:
chmod +x jdk-6u33-linux-i586.bin
./jdk-6u33-linux-i586.bin

You will see a jdk-6u33-linux-i586 folder as result of the last

Third step is to move the folder to a safe and standard place. To do that we use the next command
sudo mv jdk-6u33-linux-i586 /usr/lib/jvm/
Next we create a symbolic link, you know so you do not have to type jdk-6u33-linux-i586 all the time. We do that by typing
cd /usr/lib/jvm/
sudo ln -s  jdk-6u33-linux-i586 java
Finally, you need to set the environment variables. In my case update them since I already had openjdk installed but it will work either you have or not another version installed before. You need to do it for both java and javac
sudo update-alternatives --config javac
sudo update-alternatives --config java
Default jdk
You will need to choose the the option to the Oracle-Sun jdk you want and press enter.

To test this out you just type
java -version
javac -version

checking versions
and you should see the version you installed.

There is an easy way to this which is adding an extra repository. There are tons of PPAs that come with Oracle-SUN JDK these days, but as you know I like to have control of these things. The easy way is like this
sudo add-apt-repository ppa:webupd8team/java

sudo apt-get update

sudo apt-get install oracle-java6-installer

More information and nice guides can be found here, here and here.

Let me know if you have any questions.

Happy coding!

Wednesday, July 25, 2012

How to recover MS Windows 2003 Server admin password

From time to time I have to deal with Windows servers, you know the usual stuff, updates, configurations, slowness ;), etc. This time I got the server but I did not get the credentials to use it. I talk to the administrator and he couldn't remember and the ones he gave me did not work and it did not help that he was sitting in other country with 10 hours difference ( it was 2 am for me ).

Anyways, I had to use another approach. Usually when I have this problem I use an Ubuntu CD I have with me all the time, boot the machine and install chntpw and change/reset the admin's account password to blank to some other password, easy right?

This time though, it did not work because the server has a RAID 0 configuration and it was a domain controller secondary server. I am not an expert on this area but since it was a domain controller its credentials were store in the active directory configuration not really in the local machine and chntpw could not save the changes. As usual, I had to do it the long way.

I did some research I found that I was not alone and also found some articles explaining how to recover/reset your password some good links are this and this ( this last one needed access to the local admin account which I did not have either, might help some one though).

Finally, I found this thread where the author explains pretty much every situation related to my specific situation which was Windows 2003 server with AD configured.

The solution was to download and burn this tool, which is basically the next chntpw evolution. Just boot the computer using the CD (you can also get the USB version if you want) and you get a command line tool which has chntpw tool already. You mount the drive where windows is installed  and locate the SAM file usually in windows is in windows/system32/config/ folder. Once you are there you execute chnptw -h which will show you the version and all the options you have.
chntpw in action :)

I tried resetting the admin password but that did not work :( so I had to enable the guest account and increase its rights to admin level.  Once that was done I boot the machine normally logged in using the guest account and change the admin account, reset the password and created my own account with admin rights :)

You can use the next commands to do the same:
This will ist all users
chnptw -l SAM

To launch the interactive mode which is really helpful
chnptw -i SAM

One more thing, once you do all the changes do not forget to save the SAM file otherwise nothing will happen and also to safely umount the drive. This is very important I made the mistake very times and I had to it all over again and again.

Happy hacking and remember to use it for good reasons :)

Sunday, July 22, 2012

Installing and configuring Synergy on Ubuntu 12.04

I started using Ubuntu 12.04 and since I did a clean installation I had to re-install and configure a lot of my tools. One of them was Synergy. Synergy let's you share one mouse and keyboard among multiple computers, more or less like a KVM but with out the hardware.

I was using Mouse with out borders from Microsoft before, but as every tool that comes from them it only works with Windows and I needed something that could work on Windows and Linux and Synergy was the best option. What's more Synergy also works with Mac so If one day I get one, I know I would be able to use it there as well ;)

Anyways, the first thing I tried was to do a

sudo apt-get install synergy

It did work, but It installed an old stable version which seems to have some problems connecting to Windows 7. Like anything in life I had to do it the long way:


Download the beta version from its web site. Here it is the linkDownload the same version for each platform you wanna install it. by the time of this post 1.4.9 was the latest version.
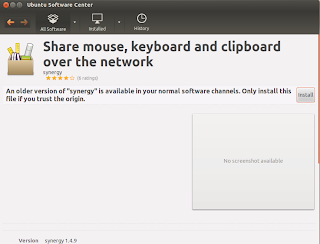

Installing Synergy

Just double click on it and it will automatically open the Ubuntu Software Center. Click on install, you might need to enter your administrator password. Also, you will get a "The package is of bad quality" alert but you can press "Ignore and Install" to continue.
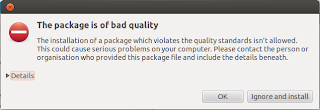

Alert window

Once it is installed you just execute it.

The configuration window will show up and you either configure the server interactively or use an specific configuration file. I chose the second option since I like writing my own configurations. Press Stop and just create a new document .synergy.conf and save it in your home directory then add these lines:

 
section: screens

        Venus:

        Marcelo:

end


section: aliases

        Venus:

                192.168.1.125

        Marcelo:

                192.168.1.131

end


section: links

        Venus:

               right = Marcelo

        Marcelo:

               left = Venus

end


If you notice there are 3 sections:
screens, where you define the number of screens you are going to use
aliases, here you need to assign each screen its IP address
links, is where you define the position of these screens. Which on is on the left, right, up, down, etc

One quick note here, you can try pinging the computer by its name and if that does not work you will have to add the computer and its ip to your hosts file. This in order to make Synergy work properly.
Windows:
C:/Windows/System32/etc/drivers/etc/hosts

Ubuntu:
etc/hosts


Finally, press Start again and make sure the option "Use existing configuration" is selected and then browse to the .synergy.conf file.
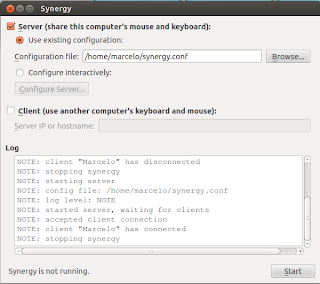

Config Window


The installation on Windows is so much simpler since we configured Ubuntu as server that means that the Keyboard and Mouse are plugged to the Ubuntu machine and it is sharing them with Windows.

I have been using this configuration for a week right now and I noticed some lag on the windows machine. I am not sure if it is because it is a beta version and it is not fully compatible with Windows 7 or because the server is on the Ubuntu or what, but sometimes the synergy process consumes more CPU than it should. I will monitoring and update this post if I find something else.

Please, let me know if you have any questions.

Now, I just wish there was a way to share mouse and keyboard with Chrome OS :)

Wednesday, July 18, 2012

How to Re-Create the Show desktop Icon on Windows

One of those useful tricks that is good to know. To be honest you can the same functionality by pressing and holding the Windows key the the letter D. Anyways I like having 3 buttons in the quick launch toolbar in windows, Chrome, Windows Commander and Show Desktop.

There are 2 ways to fix this:
The first one and easy is to download this tool and follow the steps.

The second one which I call the funny one need these steps:
Open any editor and paste this code:
[Shell]
Command=2
IconFile=explorer.exe,3
[Taskbar]
Command=ToggleDesktop

Save the file to your desktop as "Show desktop.scf"
Drag the icon to your quick launch toolbar and test it.


In reality the quick launch button uses the files in this folder:
For windows XP, 2003
%userprofile%\Application Data\Microsoft\Internet Explorer\Quick Launch

For windows vista, 7 and server 2008%userprofile%\AppData\Roaming\Microsoft\Internet Explorer\Quick Launch


Hope it helps Some one. Happy hacking :)